Appilates payment configuration
Enable payment kinds
Appilates supports three payment kinds: Online, Invoice, and Cash. Learn more about the Appilates payment options here.
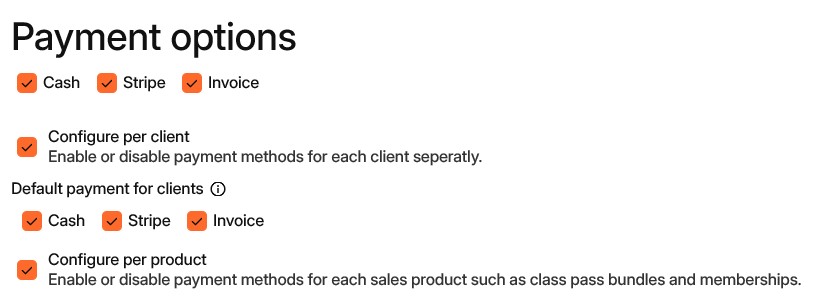
Appilates payment options
The first row of checkboxes enables or disables each payment kind for your studio. We recommend enabling and configuring all options even if you don’t plan to use a particular payment kind immediately — doing so makes the option available to your staff.
Enable online payment
By activating Stripe for online payments, you must complete Stripe onboarding. The onboarding flow is guided; have your business details ready before you start, for example your tax number and bank account information.
Start the process from this Link or sign in to the Appilates website and navigate to your Appilates subscription.
Control payment kinds per client
Enable Configure per client to allow different payment options for specific clients. For example, VIP clients might be able to pay by cash or invoice, while new clients are required to pay online in advance. When Configure per client is checked, the second row of checkboxes sets the default payment options for existing and new clients unless you override them for an individual client.
Configure per product
Enable this option to control available payment methods for each product (class pass, membership, private session, etc.). Use it when you need product-level restrictions.
Samples:
- Offer a course that is only bookable when paid by invoice.
- Offer a “first-visit private class” special that requires online prepayment.
Tax settings
If your studio is registered for a goods and services tax (GST), VAT, MWST, or similar, enable tax settings and make sure the percentage and tax name are correct for your country. Accurate tax settings ensure invoices and receipts show the right amounts.
Tax identifier
Enter the tax name and identifier used by your tax authority. Example: GST: 555-123-4564
Invoice settings
If you enable invoice payments, these fields become mandatory. The invoice settings you enter (payment terms, bank account number, and any additional payment conditions) will be printed on every invoice and shown to clients after they purchase by invoice via the app or on your website.
Related articles
All Help categories
Here all all the main help categories in the Appilates user manual.